If you’ve accidentally deleted a folder or a drive has become corrupted in Windows 10, how to recover deleted files becomes a critical question. You’ve got options ranging from checking the Recycle Bin to downloading the best data recovery software to restore your files, but none can promise you a guaranteed outcome.
That said, there is always hope. The sooner you begin the recovery process, the more likely it is you’ll get your files back. Deleted files continue to be stored on your system until they eventually become overwritten by new data.
In this article, we look at using the Windows File Recovery app to recover your lost files and break down a seemingly overwhelming task into easy-to-follow steps.
Related: The best Microsoft Office alternatives.
How to recover deleted files in Windows 10: Preparation
Using a command-line program to restore deleted files in Windows 10 isn’t beginner-friendly, so it’s worth trying simpler recovery methods first.
Start by checking your Recycle Bin for the deleted files. If you find them there, right-click them and press Restore. The files should now show up in their original folders.
If the files aren’t in the Recycle Bin—because they’ve been permanently deleted using Ctrl+Shift+Delete, for example—try the File History tool. This feature must already be activated for your files to be recoverable, and you need to already have a backup saved on an external drive such as a USB drive or on a network drive.
Furthermore, it only backs up files saved in the Music, Videos, Pictures, Documents, and Desktop folders as well as offline OneDrive files. You can activate File History via File History Settings by selecting your recovery drive and clicking Turn on File History.
To use File History, go to the files’ original folder in File Explorer, select the Home tab, and click History. You should have a view of previous versions of folders and files in this location. Locate your lost files, choose a version to recover, and click Restore.
If your files aren’t found via the Recycle Bin or File History, download the free Windows File Recovery app from your Microsoft Store and follow the steps below. You should ideally be on the Windows 10 May 2020 update or higher.

Step 1: Have a destination drive ready
For your Windows File Recovery command to work, you’ll need at least two different drives to work with. One is the source drive, where your files were originally saved. The other is the destination drive, where your files will be restored. You won’t be able to save files to the drive they were deleted from.
If your PC isn’t formatted into two or more internal drives, you can connect an external hard drive or USB stick.
Step 2: Choose either Regular or Extensive mode
After installing the Windows File Recovery app, open it from the Start menu. A command prompt will appear with a pre-written overview of the two available recovery modes—Regular and Extensive—and some command syntax examples.
Before proceeding, decide whether your recovery requires Regular or Extensive mode. Generally, Regular mode is recommended for recently deleted files. But if they’ve been deleted for a while or were part of a corrupted disk, Extensive mode is probably the best option.
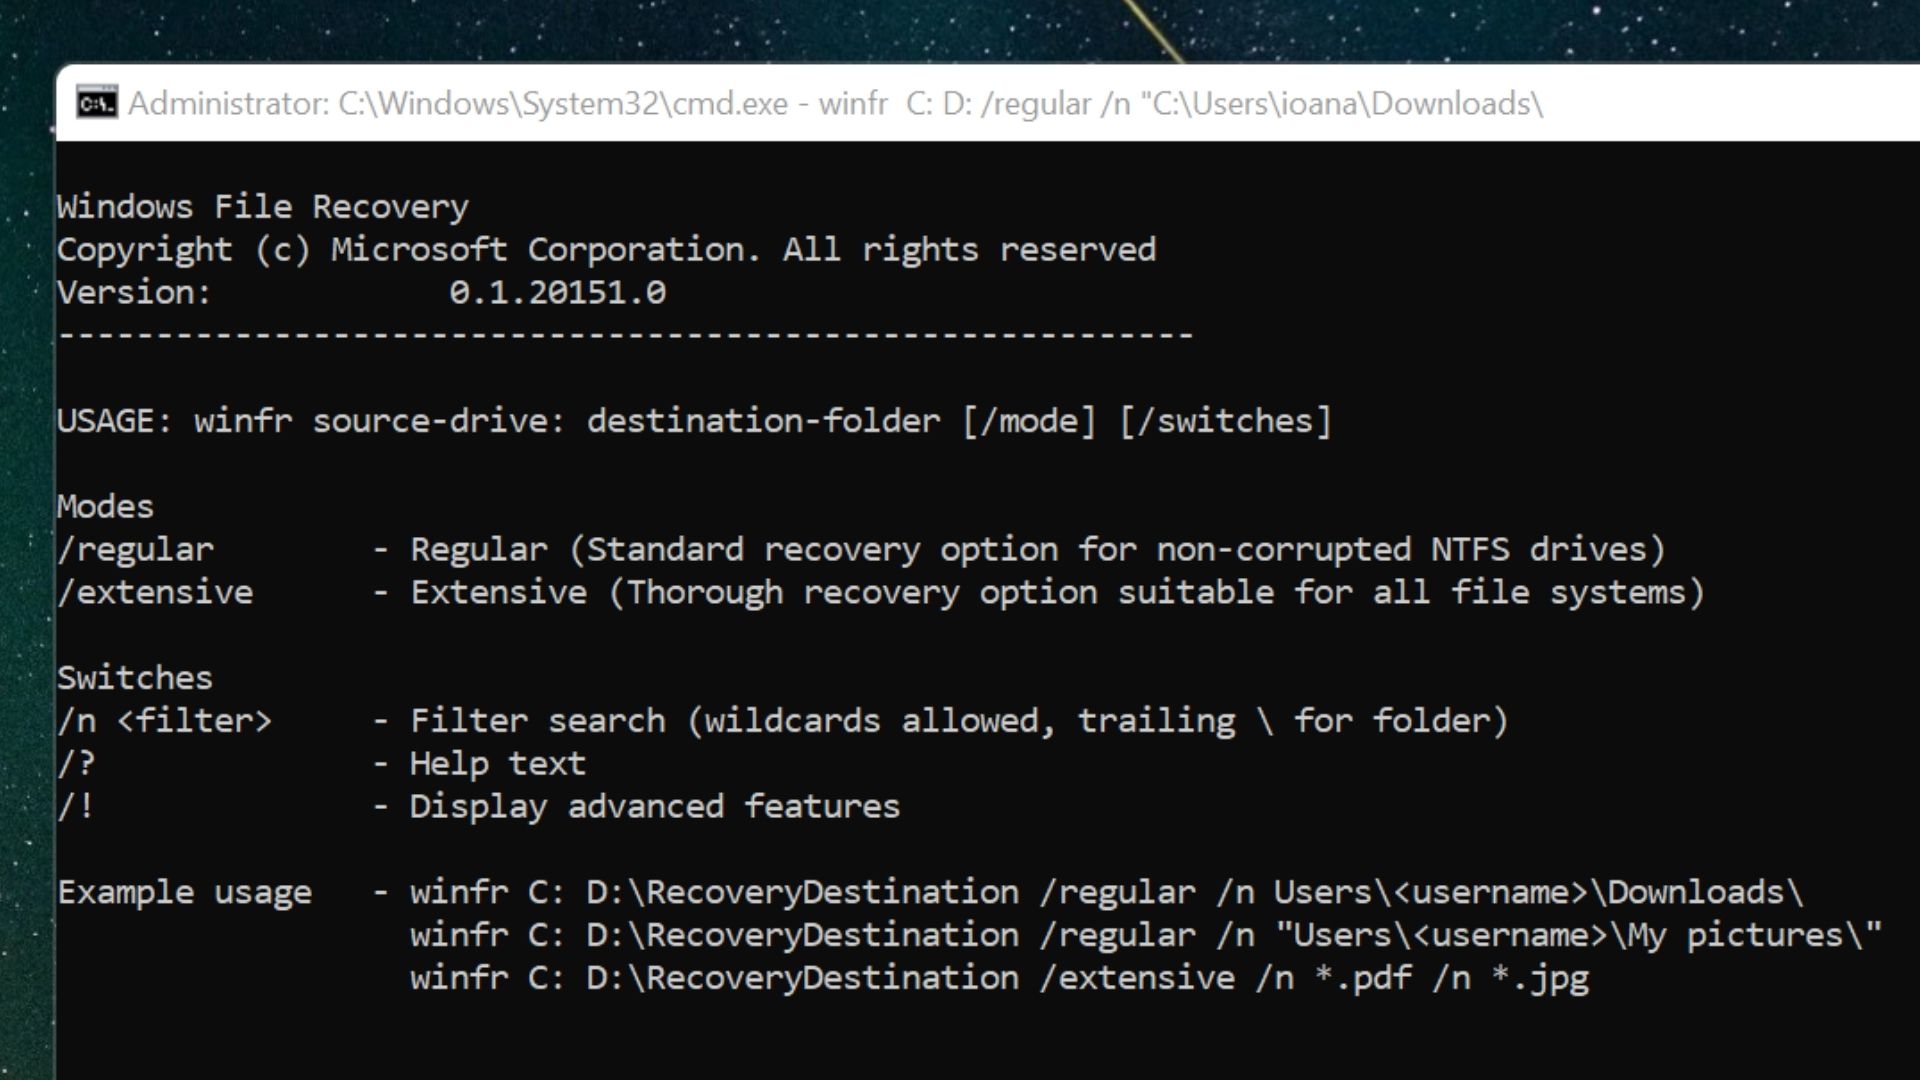
Step 3: Write a Regular command
Here is the basic command syntax for Regular recovery:
winfr X: Y: /regular /n UsersNameOfUserFolderFile.type
In the placeholder above, X is the source drive, Y is the destination drive, and the latter end of the command—including NameOfUser and Folder—indicates the path to the file’s location before deletion. Edit this command based on your own drive names and file paths.
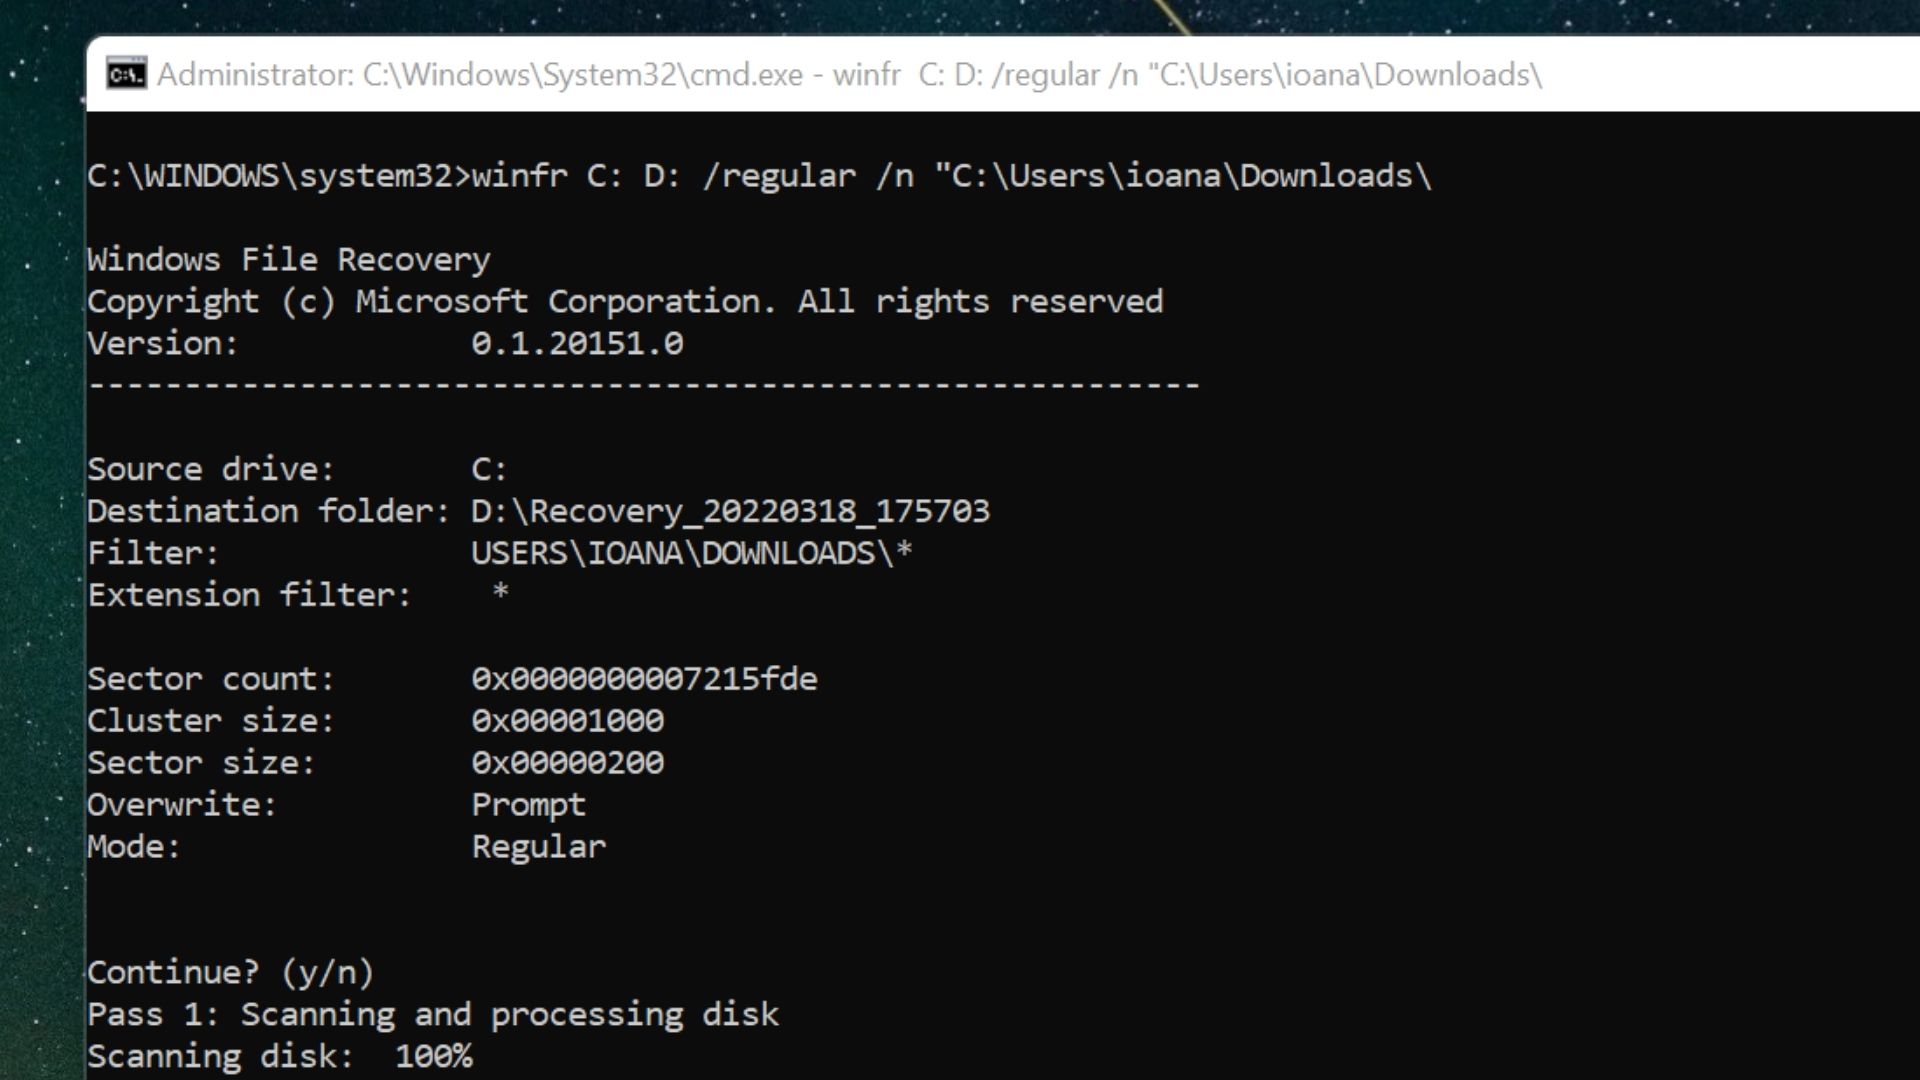
For example, if your file got deleted from drive C, is being recovered to drive D, and is titled myphoto.jpg, a Regular command could look like this:
winfr C: D: /regular /n UsersMeDownloadsmyphoto.jpg
If any of the file or folder names contain spaces, the whole path must be between quotation marks, like in the example below:
winfr C: D: /regular /n “UsersMeDownloadsmy photo.jpg”
Once the command is written, press Enter.
Step 4: Type Y to continue
The prompt Continue? (y/n) will appear in the command line. Unless you’ve made a mistake in writing the command, type Y to begin the recovery process.
Once the scan is complete, a second prompt will ask if you want to view the recovered files. Type Y to open the recovery folder in the destination drive.
Step 5: Check the recovered files
By default, Windows File Recovery creates a new folder containing the word Recovery in your destination drive. When this opens, the recovered files may be categorized into folders according to user names and file types. Take some time to search through them. If you find your lost files, you may want to copy and paste them into a different folder.
Step 6: Write an Extensive command
If the Regular command hasn’t located your deleted files, try running an Extensive one. It’s a deeper scan, but the syntax isn’t too different.
The Extensive command using our sample drive, folder, and file names from above could look like this:
There are many variations on this syntax, depending on how specific you want to be in terms of location, file type, and file name. For instance, a command that includes file type instead of file name and folder would look like this:
winfr C: D: /extensive /n *.jpg
Press Enter once you’ve written the correct command and repeat Steps 4 and 5 to try to recover your files.
Step 7 (optional): Install a file recovery software
If you haven’t managed to restore your deleted files using Windows File Recovery, you can give third-party solutions a try. Our best data recovery software buying guide outlines the scanning capabilities of products like AnyRecover, with their respective features and pricing plans.
Summary
Restoring deleted files using the Windows File Recovery app is not for the faint of heart. But if simpler methods haven’t worked, you can use its commands by following our straightforward instructions.
First, make sure you have at least two drives so one can serve as your recovery drive. Then, pick either the Regular or Extensive mode, depending on when the files were lost. Finally, use the program’s basic command syntax to scan drives based on folder, file name, file type, and more. If the program recovers any files, you can view them in the automatically generated recovery folder.
To ensure your data doesn’t get lost due to malicious attacks, check out our best Windows 10 antivirus buying guide. If you want to preemptively back up important data, read about our best cloud storage providers.
Finally, to brush up on your general Windows skills, check out these 9 Windows hacks that will make your life easier.
Original source: https://www.itproportal.com/features/how-to-recover-deleted-files-in-windows-10